Skip to main content
Nikon SDC - Basic set-up
This protocol covers the basics of turning on the microscope, mounting your sample, and acquiring a simple image.
- If the microscope is off, turn on the microscope (the protocol is also taped on the wall in the facility):
- Locate the remote control - it should be attached using velcro to the shelf on the left.
- Point the remote in the rough direction of the laser boxes and press the | button to turn the lasers and microscope on.
- Press the | button for "heat" if you are planning to use the environmental chamber.
- Wait about a minute for everything to start up.

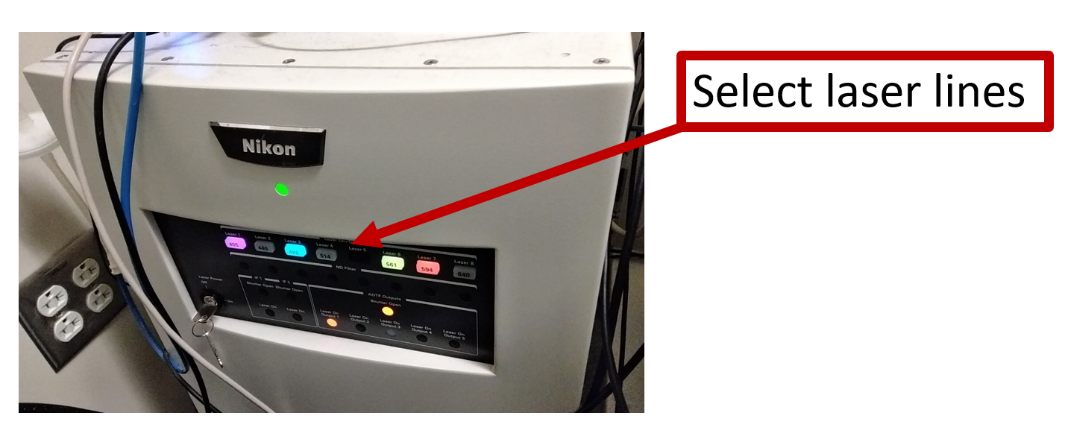
- Locate the laser box on the left and ensure that the key is set to on.
- Turn on the laser lines that you need by pressing the corresponding button. The button will blink while the laser line is warming up and will eventually stay solidly lit when the laser is ready. Note: If the button is blinking, that laser line is not yet available for the microscope to use.
- You can turn off the laser lines that you are not planning to use by pressing the corresponding button.
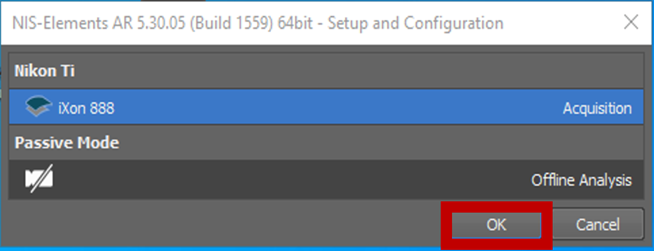
- Start Nikon Elements by clicking on the icon on the desktop

- A dialog box will pop up. Make sure the "iXon 888" camera is selected, then click ok.
- Wait for Elements to start up and the dialog box below to show up.
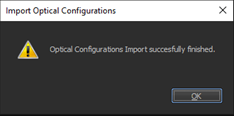
Note: If an error occurs, please contact us as the microscope might not work correctly.
- Insert the appropriate sample plate holder in the sample chamber. The available sample chambers are:
- 96-well plate holder
- Slide holder
- Note: Other holders, including round dish holders, are available in the facility. Please contact us for assistance.

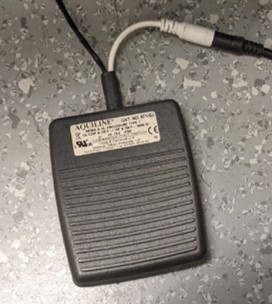
- You can turn on the lamp using the foot switch if necessary. The intensity can be adjusted with the white knob on top of the environmental chamber.
- If you are using heat, allow the entire chamber to warm up for about an hour to allow the temperature to equilibrate. If you don't allow this time, the sample may lose focus due to thermal drift.
- Place your sample in the holder. Ensure that the coverslip is facing downwards.
- You are ready to image.


No Comments