
Nikon NSTORM - Basic Set-up
Getting the system ready
-
If the microscope is off, turn on the microscope following the protocol taped to the wall:
A. Turn on the Laser Power Strip #1.
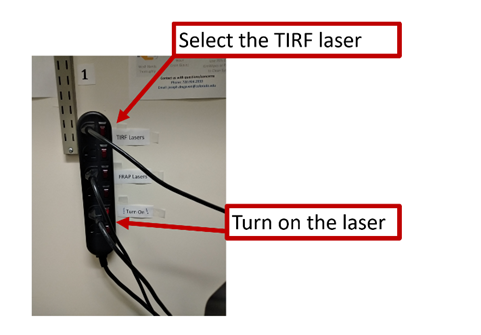
a. Turn on the appropriate laser boxes by turning the key to the ON position. Then press the grey buttons on each laser box for the laser lines you intend to use ONLY. Please leave the others in their standby (grey) state.

b. Turn on only the laser boxes you intend to use. For this training use the TIRF laser.
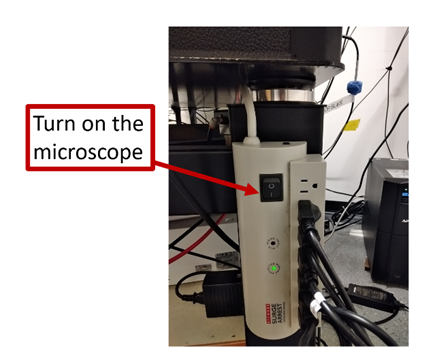
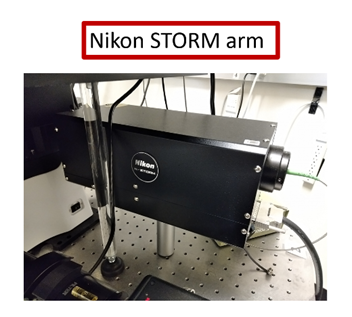
B. Turn on the Microscope Power Strip #2. This also turns on the Nikon NSTORM arm and the cameras.
C. Turn on the Computer.
-
Insert the sample plate holder
Depending on your experiment you may choose a different plate. You can turn on the light in the environmental chamber using the pedal switch on the floor under the microscope. The intensity can be adjusted with the white knob on top of the environmental chamber. If there are any oil stains on the equipment please clean up with ethanol before starting your experiment.

-
Nikon N-STORM microscope features
This microscope offers several capabilities, it has 3 light sources and 3 cameras. This manual will describe how to use the TIRF lasers but you could also use the FRAP lasers or the brightfield mode with the Lumencor SOLA Light Engine.
The Nikon motorized TIRF arm controls the TIRF angle.
There is a sCMOS camera, Hamamatsu ORCA-Fusion with 2304x2304 pixels and two EMCCD cameras, Andor iXon 897 with 512x512 pixels. You can use a single EMCCD camera or both of them for simultaneous two channel imaging.

To trigger the acquisition with the correct camera(s), select it on the BNC switch box.

The system is now ready for laser alignment and imaging.
No Comments