
Nikon NSTORM - Mode of operation
Microscope Controls
To control the microscope stage, you will use the joystick. The central knob controls the X and Y directions, you can change the speed by twisting the top of it.
The two knobs on the sides of the joystick can be used to lower or raise the objectives and bring the sample into focus. You can also do this by using the two knobs on each side of the microscope itself.
Note: On Nikon microscopes, when you turn your fingers UP the objective goes UP and vice versa.

- Select one of the Nikon Elements versions on the desktop. During the training you used the Hamamatsu Fusion and we will use this one for this manual as well.
- Click OK when the dialog box appears saying “Optical Configurations Import successfully finished.”

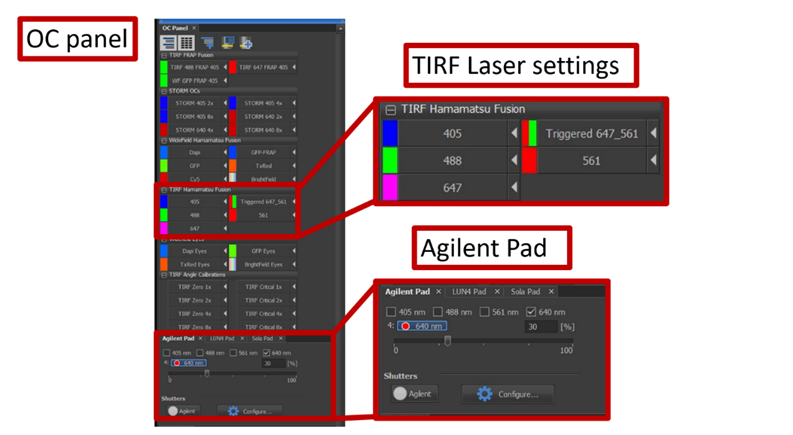
Overview of the Optical Configuration (OC) panel
The OC Panel contains the different light source configurations. For each light source, you can select a different fluorescence channel which is a combination of a laser line and a filter set. The TIRF Hamamatsu Fusion lasers is what you will need to work with in this example.
The light source is controlled by the Agilent Pad for the TIRF lasers. In this Pad you can adjust the laser power. Make sure you selected the wavelength that is actually turned ON on the laser box.
-
Ti2 Pad
The Ti2 Pad allows you to change objective. Every time you click on an objective, the objective plate lowers itself before turning to the next one for safety.
It lets you choose the light path you need and choose to use the PFS (perfect focus system) or not. You can then drive the objective up and down with the Z Drive, adjust the intensity of the transmitted light with the DIA control slider. There is also an option to change the filters.

To control the microscope stage and move your sample above the objective you can also use the XYZ navigation panel. This allows you to finely control the steps or set the same position from one experiment to the next.

Align the TIRF laser
-
TIRF Laser alignment procedure
During your training you practiced aligned the TIRF laser without a sample at first. This is a reminder of the procedure to get the laser going straight up when you position your sample on the microscope. Once you place the sample on the microscope it will only require minor adjustments.
You can control the TIRF laser angle with the Ti2 N-STORM XY-F-Zoom Pad. Click on the mouse cursor button to control the X and Y directions with the mouse wheel. When you click on the mouse cursor button for the focus adjustment you will bring your beam in focus. You can change the mouse wheel speed from coarse (fast) to fine and extra fine (slower).

When you turn on the TIRF laser (using the controls in the OC Panel) it will be misaligned and out of focus, far from the blue tape target on the ceiling straight above the microscope objective. Use the X and Y alignment directions to bring the beam centered on the target on the ceiling and then use the focus button to focus the beam in the center of the target.

IMPORTANT NOTE: to be able to scroll the mouse wheel to control the TIRF laser you MUST click somewhere on the Ti2 N-STORM Pad. If you happen to click somewhere else on the Nikon Elements software, the mouse wheel won’t be connected to the TIRF laser control anymore.
STORM Imaging
At this point in your training it was time to look at the sample. We used the demo sample made of fluorescent beads in water. If you are using the 100x oil immersion objective, start by dropping a drop of oil on the top of the objective, as described in this tutorial video.
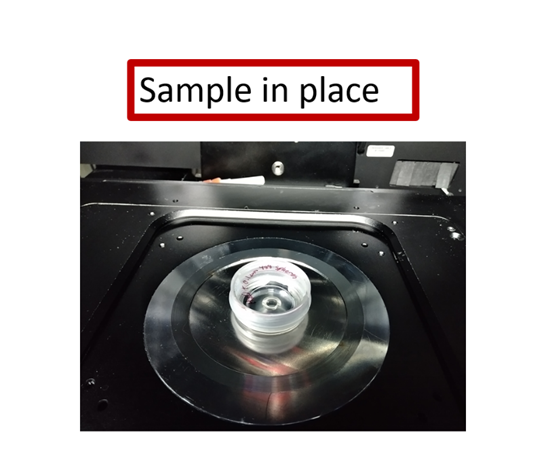
You are now ready to delicately place the sample on the sample plate holder.
-
Bring the sample into focus
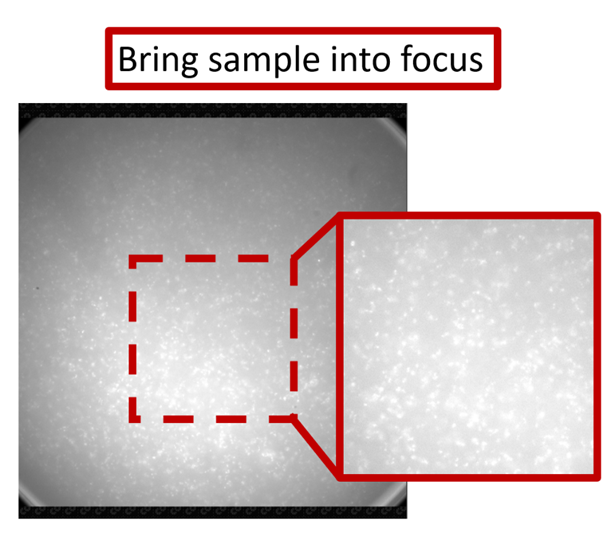
-
Re-align the TIRF laser
Following the same procedure as above, bring the laser straight and focused on the blue target on the ceiling.

-
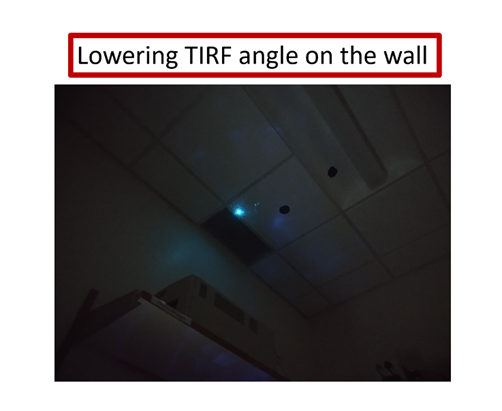
Finding the TIRF angle
Using the Ti2 NSTORM controls, lower the laser in the direction of the wall until it is almost parallel to the surface of your sample.
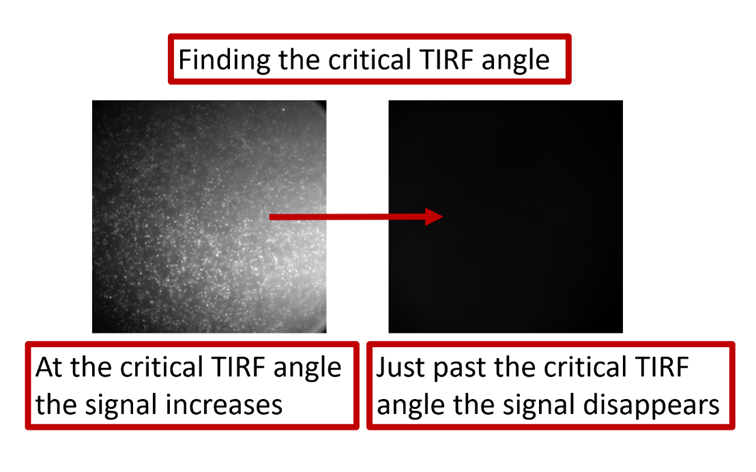
While you are lowering the laser beam, keep looking at your sample on the Nikon Elements viewer. As you get close to the critical TIRF angle, the beads will become brighter. When you are just past the critical angle the signal will disappear. You can then adjust the angle using the fine control until you have optimized your signal and it is blinking.
Optimizing the image
-
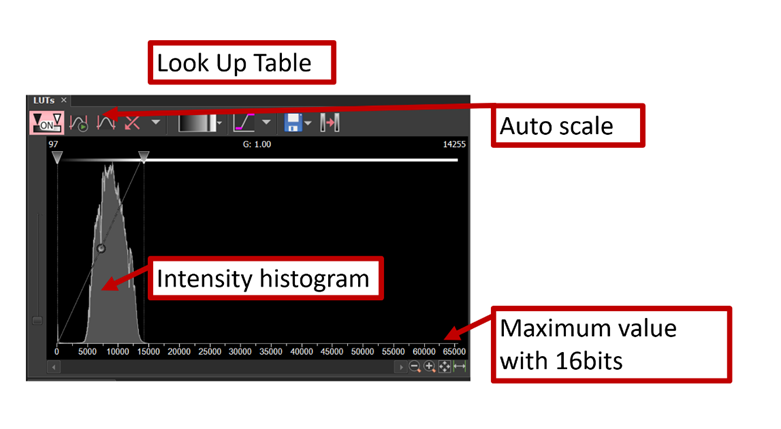
Understanding the Look Up Table (LUT)
Depending on the camera you are using and how much signal your sample emits with the laser settings that you chose, your image may be very dim to start with, to the point that you don’t see anything. The first thing you should do is adjusting the Look Up Table.
To auto-adjust the lookup tables, clicking on the Auto Scale buttons above the image of interest.
 This button will adjust the lookup table for each frame (useful in live view mode)
 This button will adjust the lookup table for the current image
You can also set the range of the Look Up Table by dragging the lines on either side of the intensity histogram with the little triangular cursor on the top. If the intensity histogram reaches the end of the range (65535 for the Hamamatsu Fusion which has a 16bits dynamic range) that means your image is saturated and you need to reduce the laser power or the exposure time or both.
-
Adjusting the exposure and laser power
In the Fusion Settings Pad you can adjust the exposure of your image.
For successful STORM imaging you should pick an exposure time under 100ms, 20ms is typical of many STORM experiments.
You can also choose to bin your image (i.e clumping the pixels together to make bigger pixels). The scan mode can be adjusted as well to optimized your data. If you don’t see many blinking events you might be scanning your sample too fast.
Adjusting the ROI (i.e Region Of Interest) is a good idea if you do not need to acquire the entire field of view.

In the Agilent Pad you can adjust the laser power, expressed as a percentage of the maximum power for each laser.

When your image is optimized and you have a good signal with blinking fluorophores it is time to look at the acquisition settings.
Image acquisition and saving
The Nikon Elements software offers many options for acquiring and saving your data. For STORM experiments you will typically want to acquire a time lapse image stack.
-
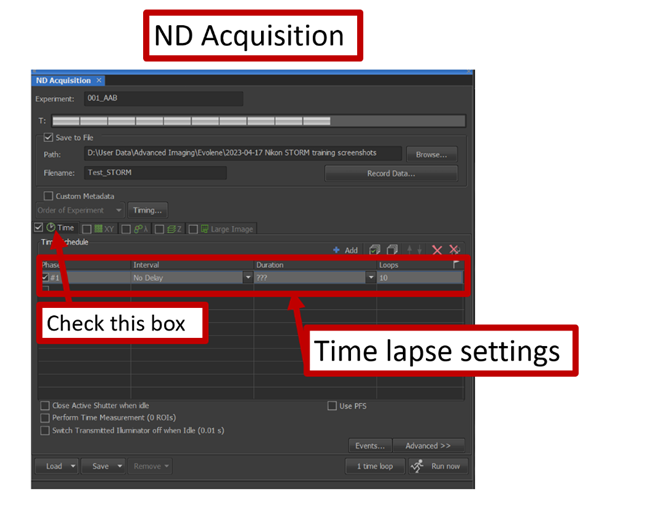
Acquiring a time lapse image
In the ND Acquisition Panel, check the box to “Save to File” and choose your destination and filename.
a. To acquire a time lapse image stack, you need to check the box that says Time.
b. Then you can define your acquisition settings. The number of loops is the number of images in your time lapse stack.
c. When you are ready to image click “Run now”
No Comments