
Nikon A1R - Basic setup
This guide describes how to turn on the microscope and mount your sample on the microscope.
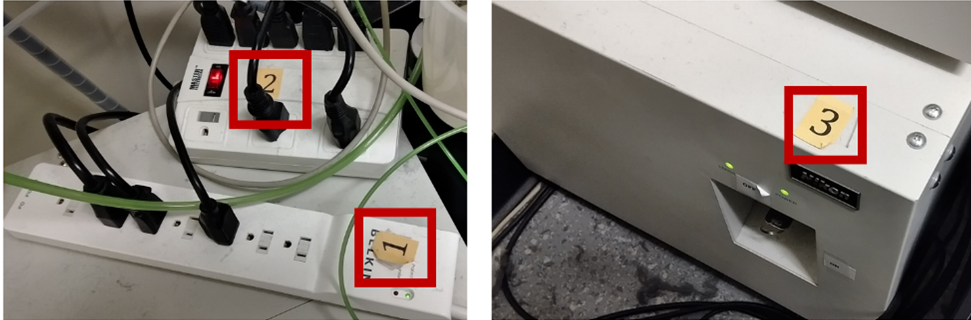
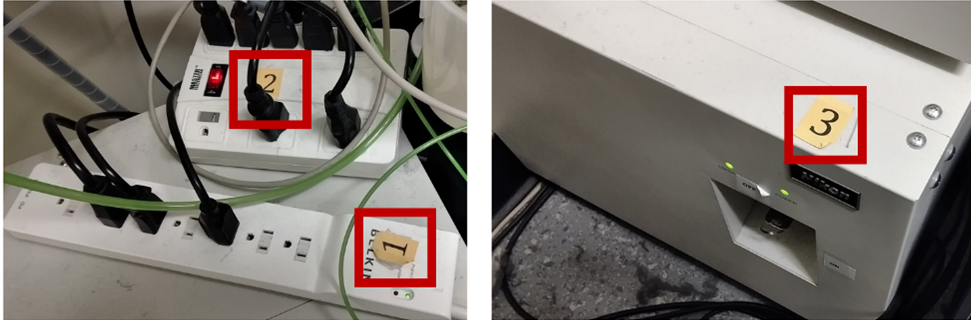
- If the microscope is off, turn on the microscope (the following protocol is also taped to the wall):
- Turn on power strip 1.
- Turn on power strip 2.
- Turn the key on the laser box labeled 3 to the ON position (right).
- Turn on the computer
- Start Nikon Elements by clicking on the icon on the desktop.

- Wait for Elements to start up and the optical configurations to import successfully.
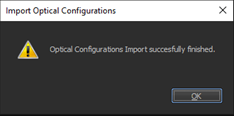
Note: If an error occurs, please contact us. The microscope will likely not work if the configurations are not imported correctly. - Using the Elements software, click on the objective you plan to use an wait for the microscope to finish switching.
- If you are using the 100x oil objective, add a single drop of oil (watch video).
IMPORTANT: Only add oil to the 100x objective. Oil on the air objectives could result in damage. If a mistake happens, please email us immediately so we can clean the objective.
- If you are using the 100x oil objective, add a single drop of oil (watch video).
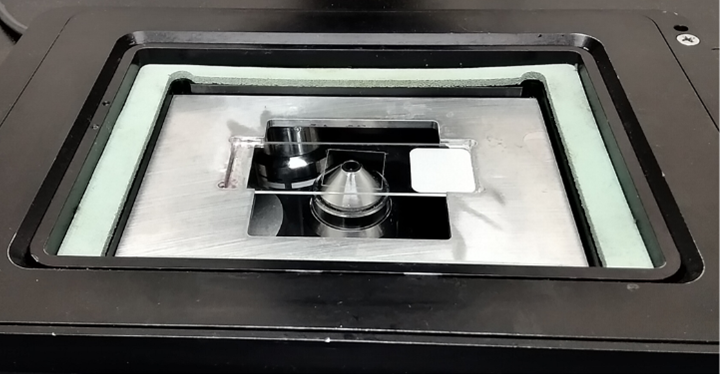
- Insert the appropriate sample plate holder. You should choose the appropriate holder depending on the imaging plate you are using (slide, 96-well plate, round dish holder).
- Mount your sample on the holder (the picture below shows a slide mount). Make sure the cover slip is facing downwards. If there are any oil stains on the equipment please clean up with ethanol before starting your experiment.
- You are now ready to image. Please read the following pages on setting up the perfect focus system (PFS) and acquiring an image.
-
To control the microscope stage, you will use the joystick. The central knob controls the X and Y directions, you can change the speed by twisting the top of it.
The knob on the side of the joystick can be used to lower or raise the objective and bring the sample into focus. You can also do this by using the two knobs on each side of the microscope itself.


No Comments