
Adjusting the lookup tables
When acquiring images, the camera records the intensity of light falling on each pixel. This results in a greyscale image that is later colored by the Nikon Elements software. The apparent brightness of each pixel can be adjusted using a "lookup table" (LUT). Note: This only changes the way the pixels are displayed on the screen, not the raw data.
Auto-adjust
To auto-adjust the lookup tables, clicking on the Auto Scale buttons above the image of interest.
![]() This button will adjust the lookup table for each frame (useful in live view mode)
This button will adjust the lookup table for each frame (useful in live view mode)
![]() This button will adjust the lookup table for the current image
This button will adjust the lookup table for the current image
Manual adjustment
Alternatively, you can change the lookup table automatically using the LUTs panel.
- If the image is very dark, it is likely that the lookup table will look like the image below. To make things easier, first click on the auto-scale button
 on the bottom right of the panel.
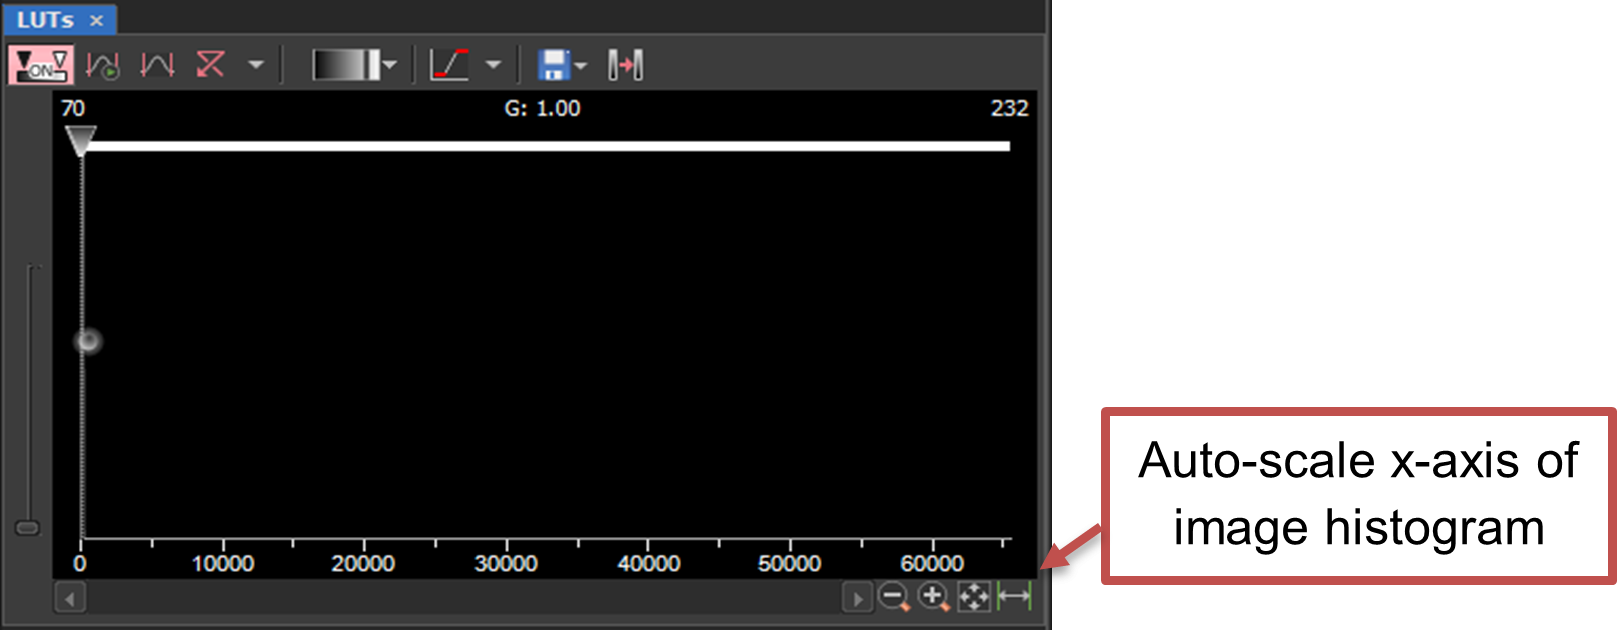
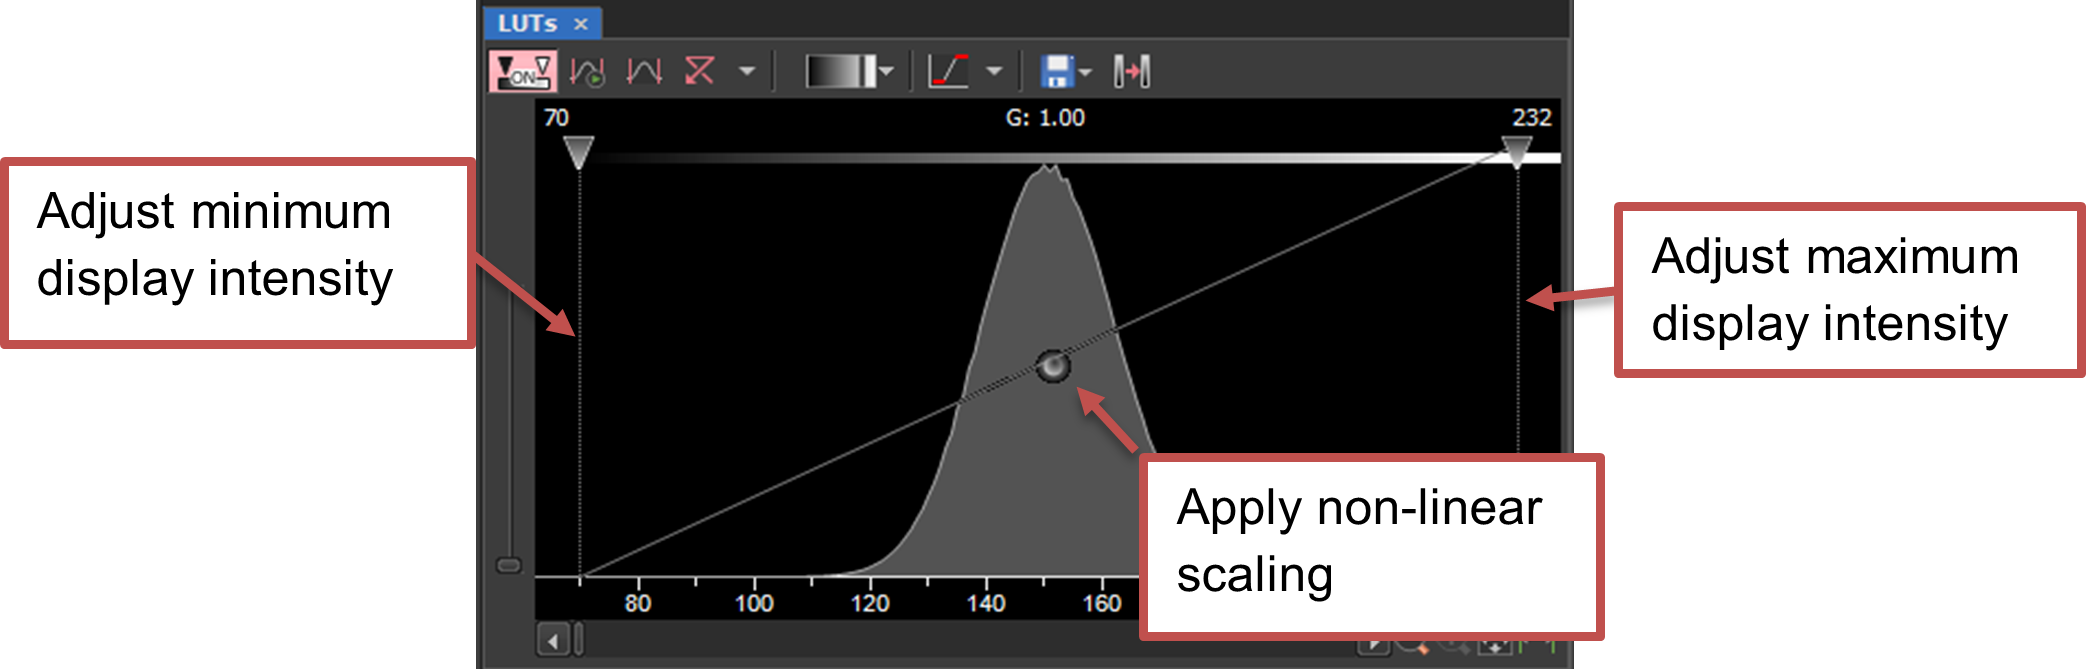
- When the histogram appears, you can drag the lines at either end to adjust the minimum and maximum intensities in the displayed image. You can also drag the dot at the center of the line to apply a non-linear scaling.


If viewing a multi-channel image, a histogram will appear for each channel:

Notes:
- Any pixel with a value lower than the minimum display intensity value will appear black.
- Any pixel with a value higher than the maximum display intensity value will appear white (in greyscale) or as the brightest intensity of the default color.
- Instead of dragging the slides, these values can also be manually adjusted by clicking on the number and entering a new number. This can be useful when comparing different images.
No Comments