
Basic use
This protocol covers the basics of mounting your sample on the microscope and setting up the perfect focus.
- If the microscope is off, turn on the microscope following the protocol taped to the wall.
- Start Nikon Elements:
- Click on the icon on the desktop

- Click OK when the dialog box appears saying “Optical Configurations Import successfully finished.” Note: If an error occurs, please contact us as the optical configurations may be corrupted.

- You might hear a beep and the perfect focus button might be flashing. If this is the case, disengage the system by pressing the button on the microscope base.
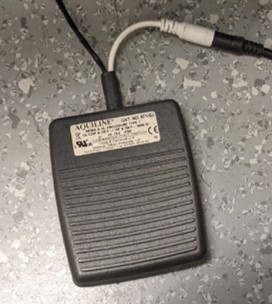
- Turn on the internal lamp using the footswitch if you need light.
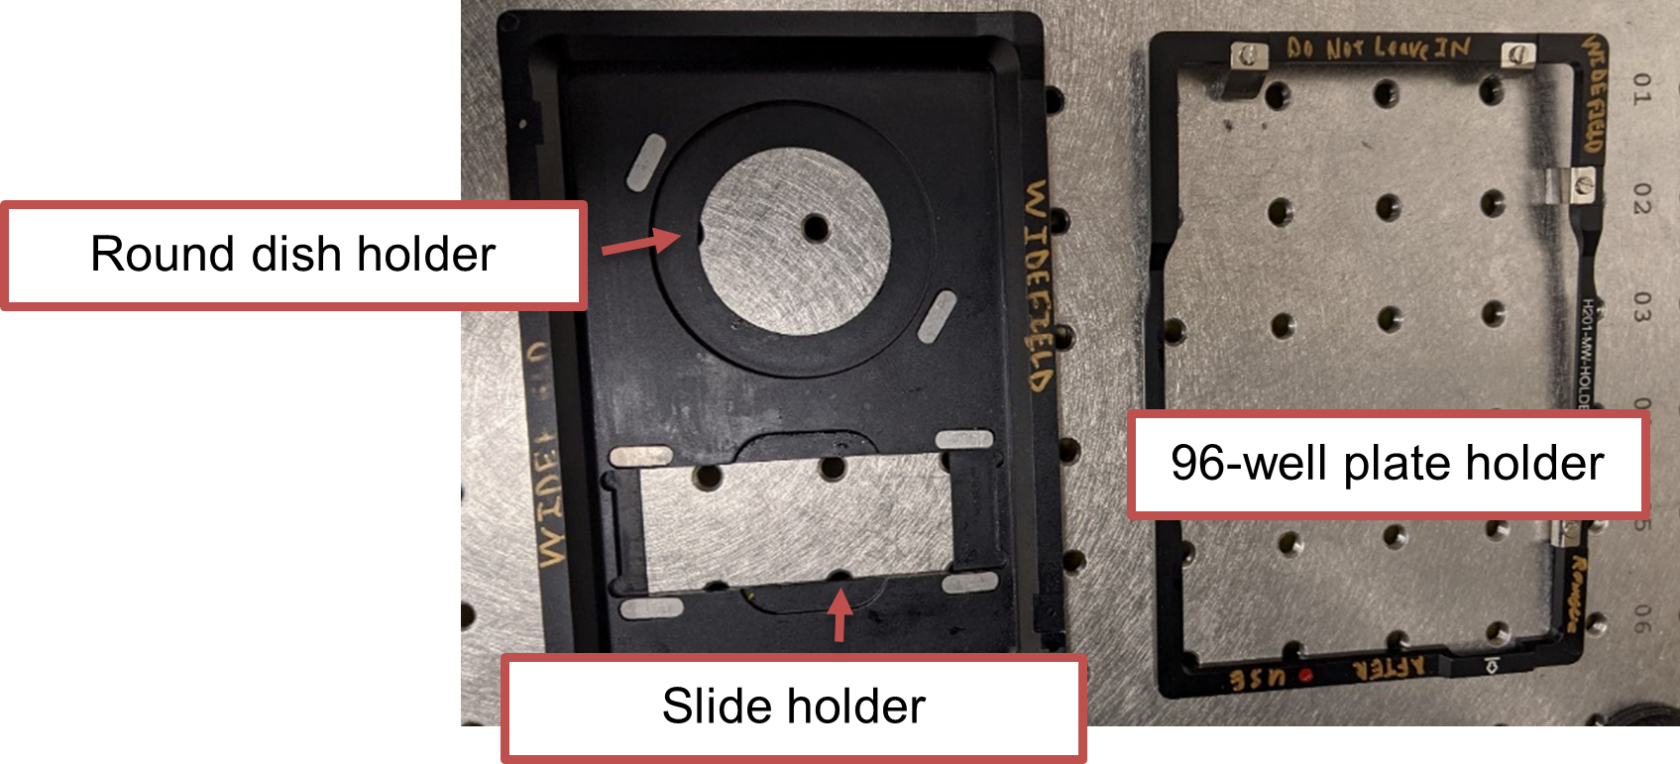
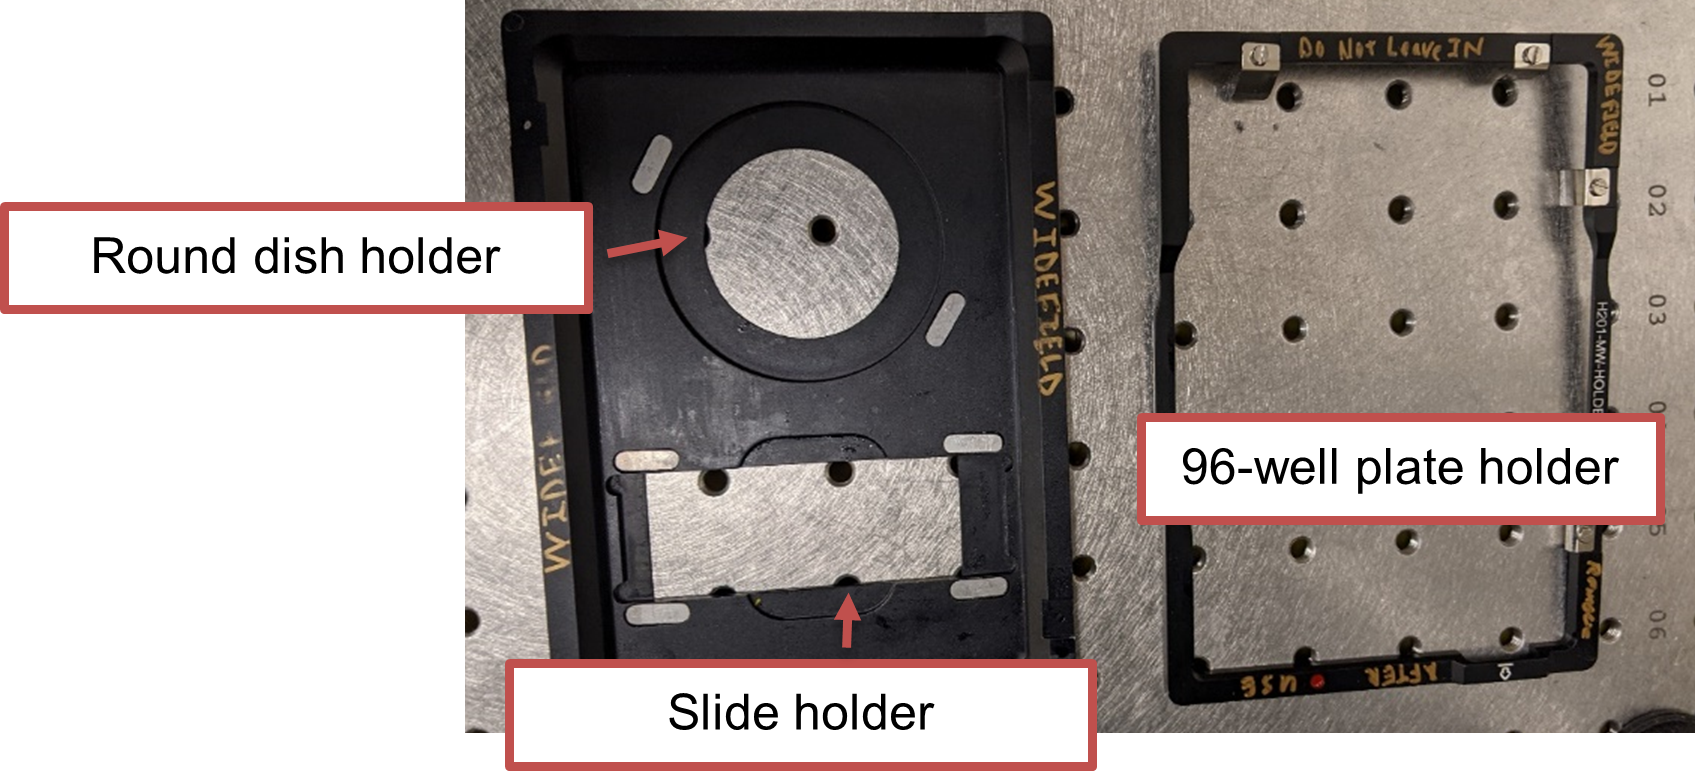
- Place the appropriate sample holder into the microscope chamber:
- Use the holder with the rectangle cutouts for slides
- Use the holder with the circular cutout for round dishes
- Use the plate insert for 96-well plates
- Select the appropriate objective in Elements by clicking on the corresponding button on the Macro Panel (left of the screen by default). Wait for the microscope to finish changing objective before moving on.
- Move the lens to be roughly at the center of the sample holder using the joystick.
- If your samples require heating, make sure the temperature controller is turned on and set to the correct temperature. Leave the system for at least 1 hour to allow temperature to equilibrate otherwise you will see significant sample drift over this time.
- Only if using 100x objective, add one drop of imaging oil. Important: DO NOT ADD OIL IF YOU ARE USING ANY OTHER OBJECTIVE AS THIS WILL DAMAGE THE OBJECTIVE.
- Place your sample on the holder with the cover slip facing down towards the objective.
- Engage the perfect focus system (PFS). See this page for more instructions.
- Once the PFS is engaged, turn on live mode.
- Refine the focus by adjusting the perfect focus offset using the Perfect Focus wheel.
- If using heating, check that cells are present, then leave for ~30 minutes to 1 hour if possible. Again, this will prevent sample drift.
- Acquire your images.

No Comments