Using the Perfect Focus System (PFS)
The perfect focus system locates the coverslip and continually adjusts the objective height to follow any drift in the system.
Engaging the PFS
- If using the 100x oil objective, first raise the objective by turning the z-axis control until the oil contacts the sample.
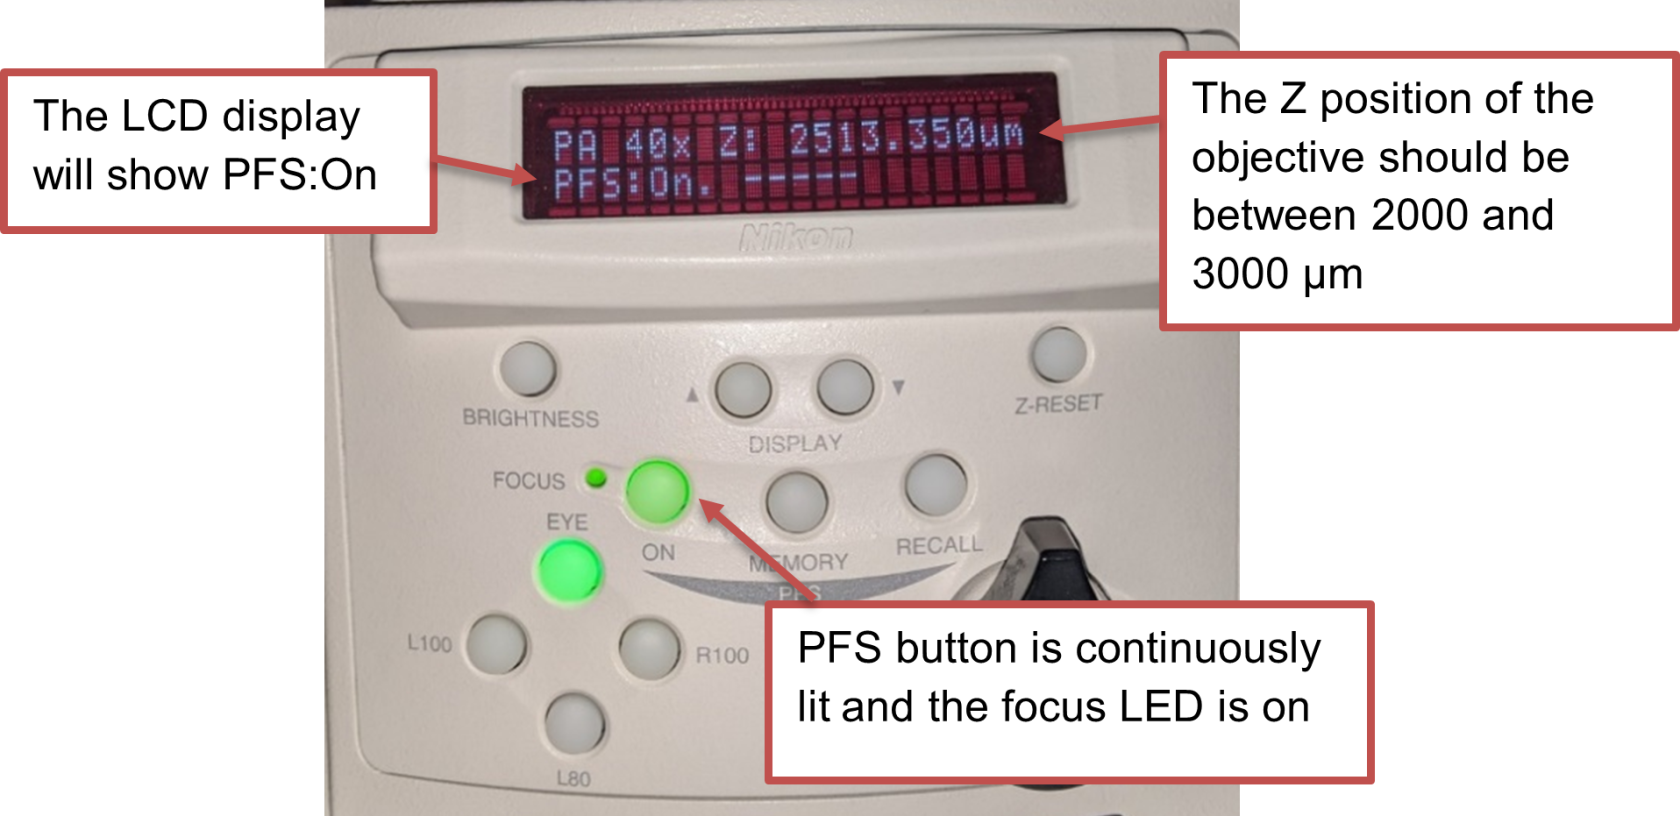
- Press the PFS button on the microscope base. You will hear several beeps and the light will start blinking, indicating that the microscope is searching for the focal plane.
- Raise the objective slowly until you hear a beep using the black knob on the right side of the joystick. The PFS button will be solidly lit when perfect focus is engaged correctly and the LED next to the FOCUS display will be lit. Be careful not to push the objective into your sample - this will damage the objective and lead to costly repairs.
- The display on the LCD screen on the microscope base indicates the Z position of the objective. The typical Z-position is between 2000-3000 µm.
- If you turn the knob the wrong way (i.e., lowering the objective), you might hear a continuous tone. This is fine - you just have to reengage the PFS system by pressing the button.
- If you are having trouble getting perfect focus to engage, see Troubleshooting Perfect Focus below.
Refining the perfect focus offset
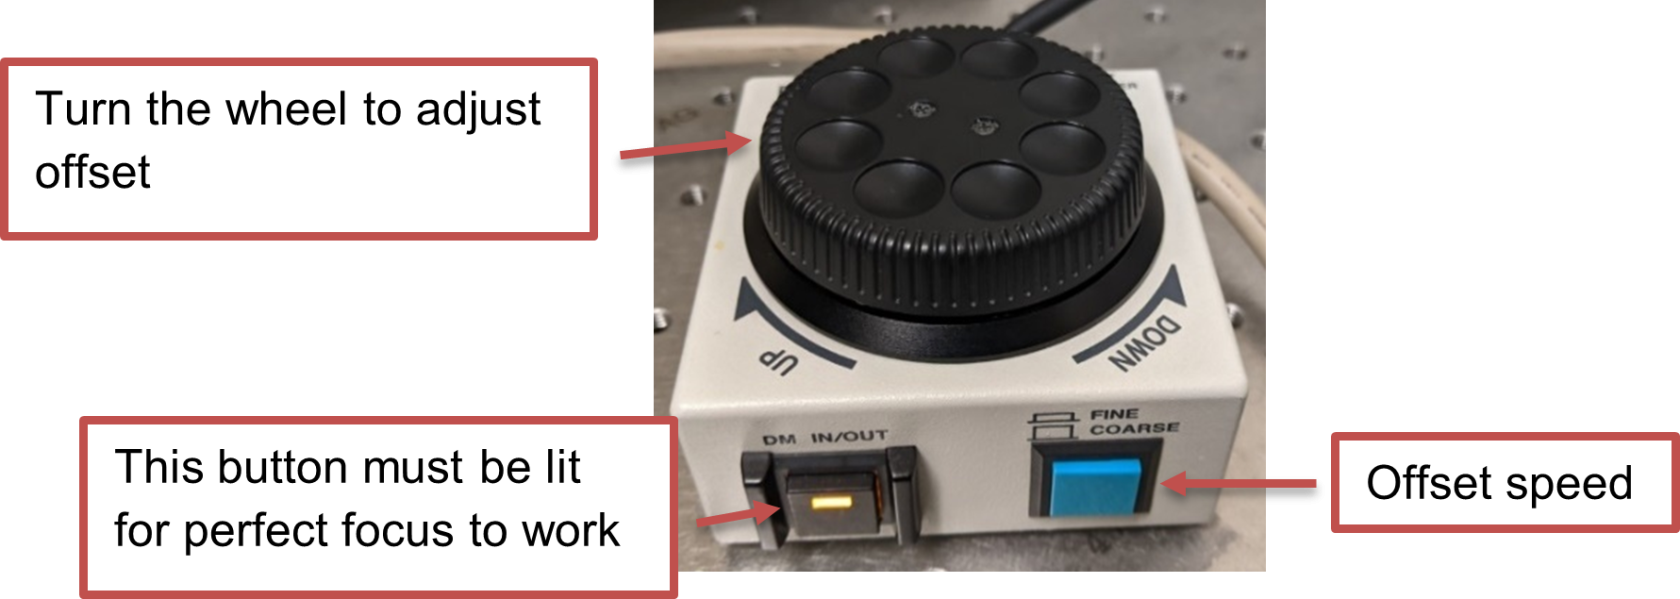
Once perfect focus is engaged, you cannot change the z-position of the microscope. However, to get cells in focus, you can change the perfect focus offset using the perfect focus wheel.
- 1. Start Live view.
- 2. Adjust the perfect focus offset by rotating the perfect focus wheel.
- The blue button can be used to change the offset change speed. When the button is pressed in, turning the wheel changes the offset a little bit. When the button is out, the turning the wheel changes the offset a lot. You should start with coarse adjustment until you start to see some cells, then switch to fine.
- When the cells are in focus, click on the
 button next to the selected optical configuration to save the settings.


