Basic use
This protocol covers the basics of turning on the microscope, mounting your sample, and acquiring a simple image.
If the microscope is off, turn on the microscope (the protocol is also taped on the wall in the facility):
TurnLocate the remote control - it should be attached using velcro to the shelf on the left.- Point the remote in the rough direction of the laser boxes and press the | button to turn the lasers and microscope
usingon. - Press the
remote|that is attached on the wall.Turn on the heatbutton for "heat" if you are planning to use the environmentalchamberchamber.if - Wait about a minute for everything to start up.
.
needed
- that the key is set to on.
Turn on the laser lines that you need by pressing the
buttonscorresponding button. The button will blink while the laser line is warming up and will eventually stay solidly lit when the laser is ready. Note: If the button is blinking, that laser line is not yet available for the microscope to use.- You can turn off the laser lines that you
don’tareneednot planning to use by pressing the corresponding button.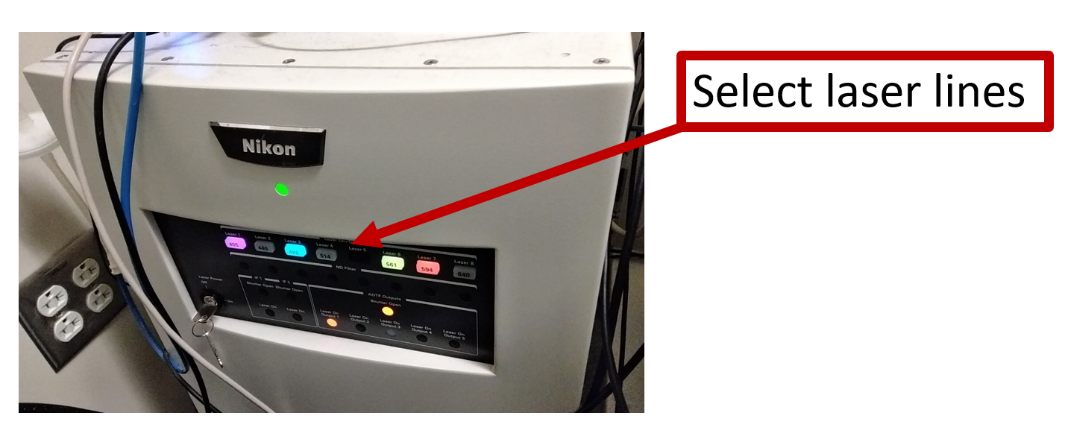
- You can turn off the laser lines that you
- Start Nikon Elements by clicking on the icon in the desktop

- A dialog box will pop up. Make sure the "
.iXon 888" camera is selected, then click ok.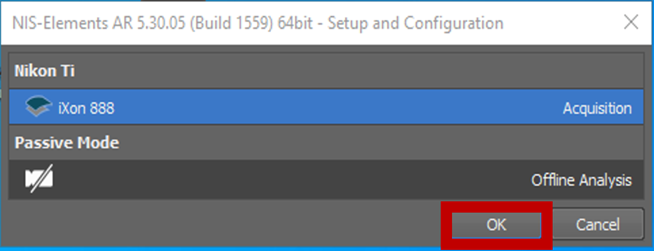


Note:
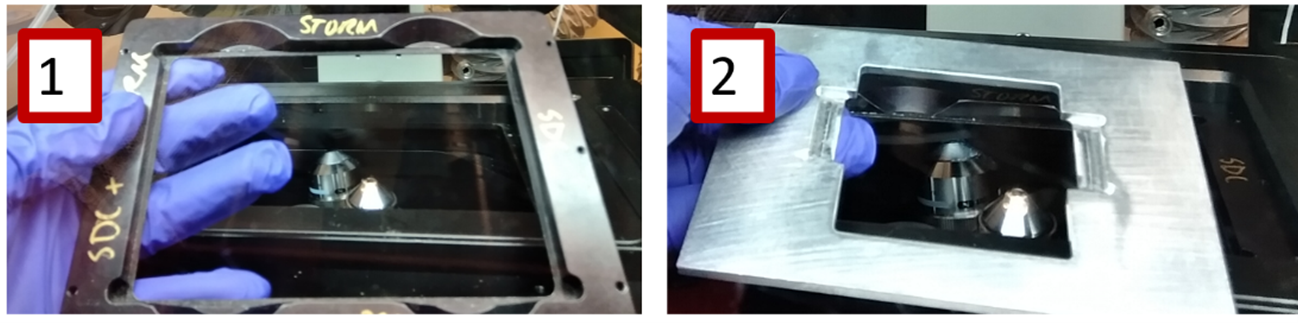
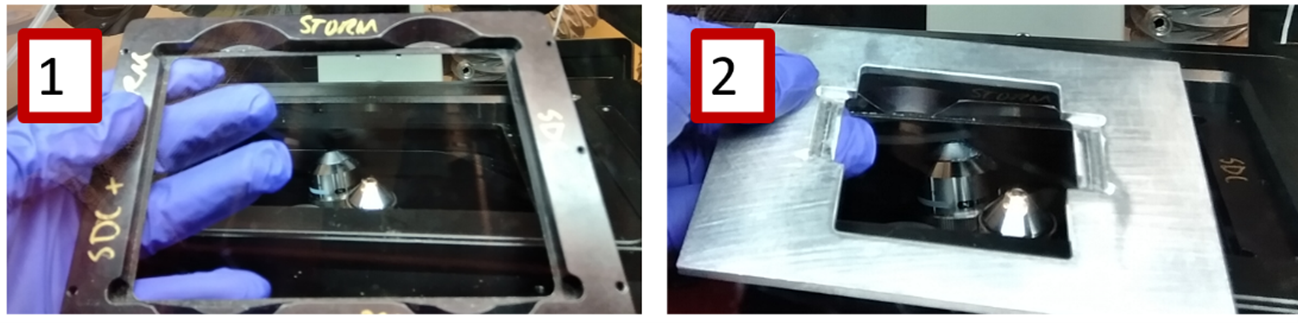
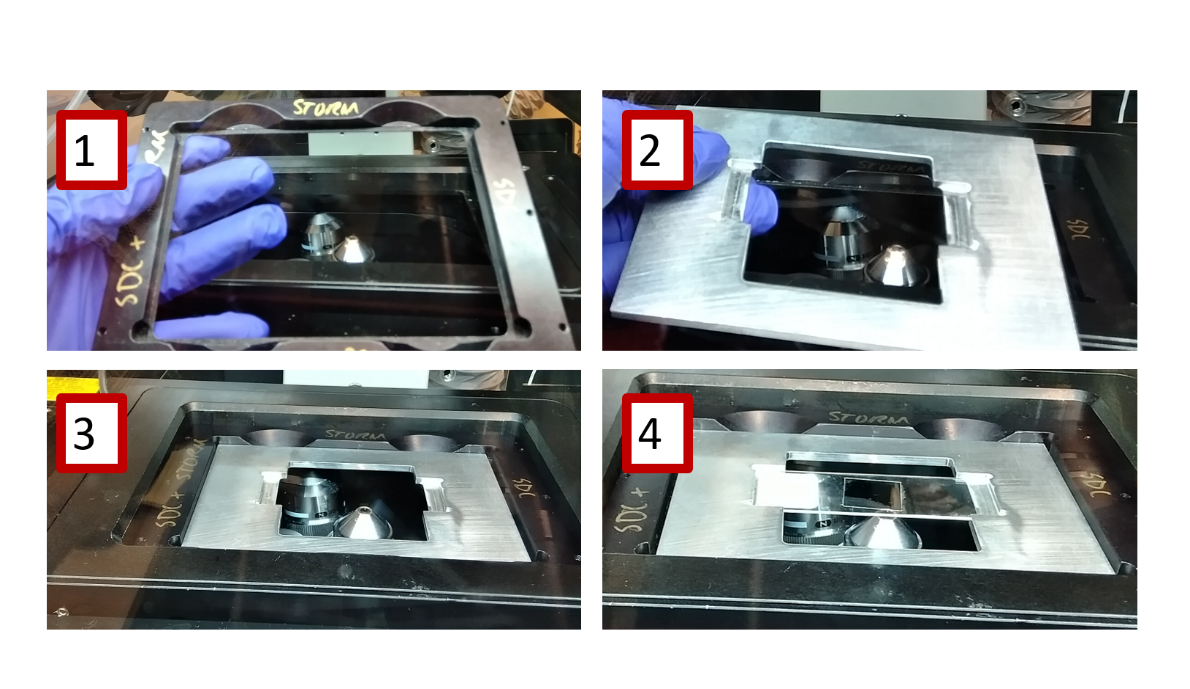
Insert the appropriate sample plate holder
in the sample chamber. The available sample chambers are:- 96-well plate holder
- Slide holder
- Note: Other holders, including round dish holders, are available in the facility. Please contact us for assistance.
Depending on your experiment you may choose a different plate. lightlamp using the foot switch if necessary.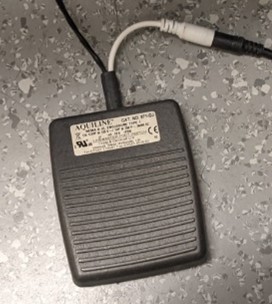
environmentalholder. chamberEnsure using the pedal switch on the floor under the microscope. The intensity can be adjusted with the white knob on top of the environmental chamber. If there are any oil stains on the equipment please clean up with ethanol before starting your experiment. The following figure shows the steps to look at a sample slide. Remember to always placethat the coverslip towardsis thefacing objective.
- downwards.
- You
NikonareNDCreadymicroscopetofeatures
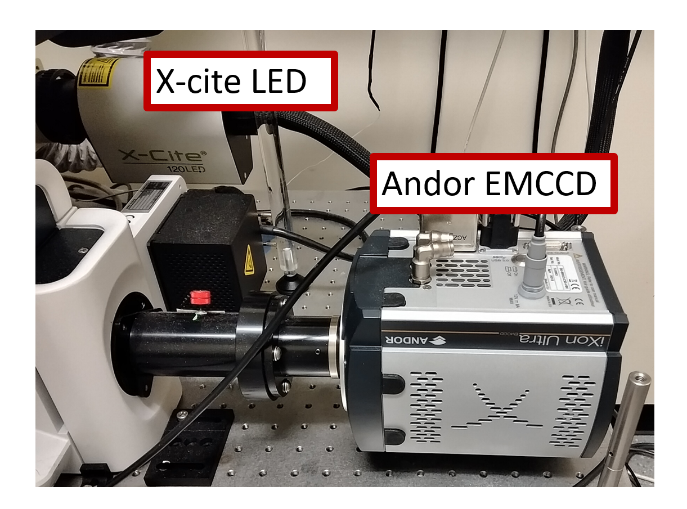
This microscope offers several capabilities, it has two light sources and one camera. In addition to the laser system, you can use the X-cite LED in widefield mode. The camera installed is an EMCCD iXon 888 with 512x512 pixels.
Click on theNikon Elementsiconon the desktop.Then click ok foriXon888.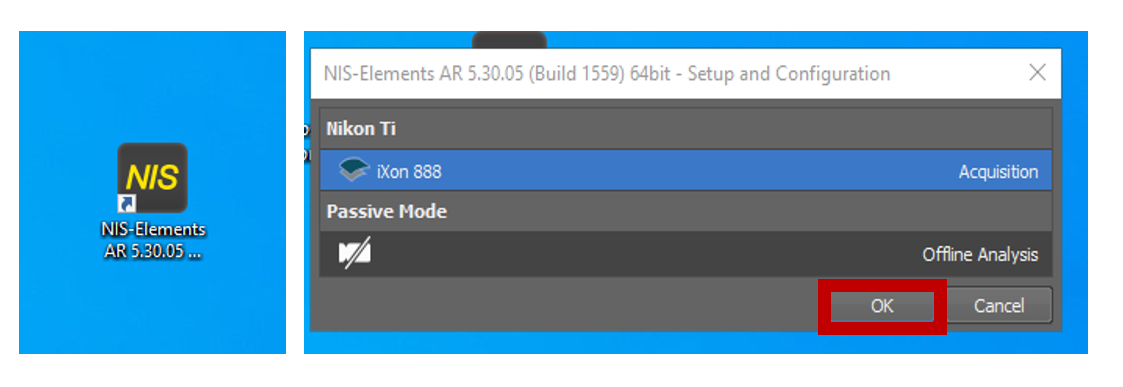
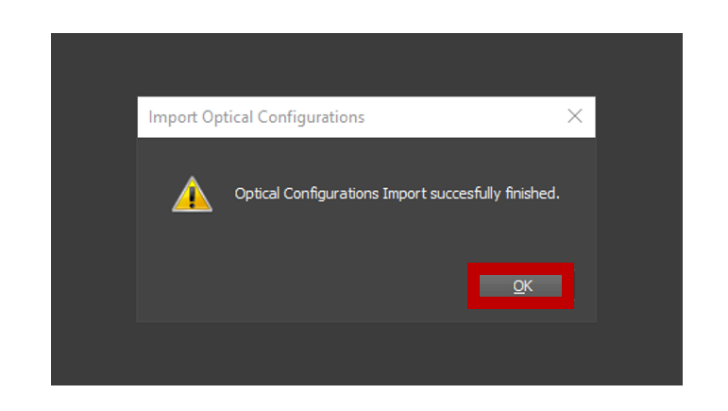
Click OK when the dialog box appears saying “Optical Configurations Import successfully finished.”