8. Bruker TruLive3D Using the photo-manipulation (PM) feature
The Bruker TruLive3D has a photo-manipulation (PM) feature that you can use to ablate specific areas of your sample.
Calibration of the PM module
Before performing any kind of photo-manipulation, the PM module needs to be calibrated.
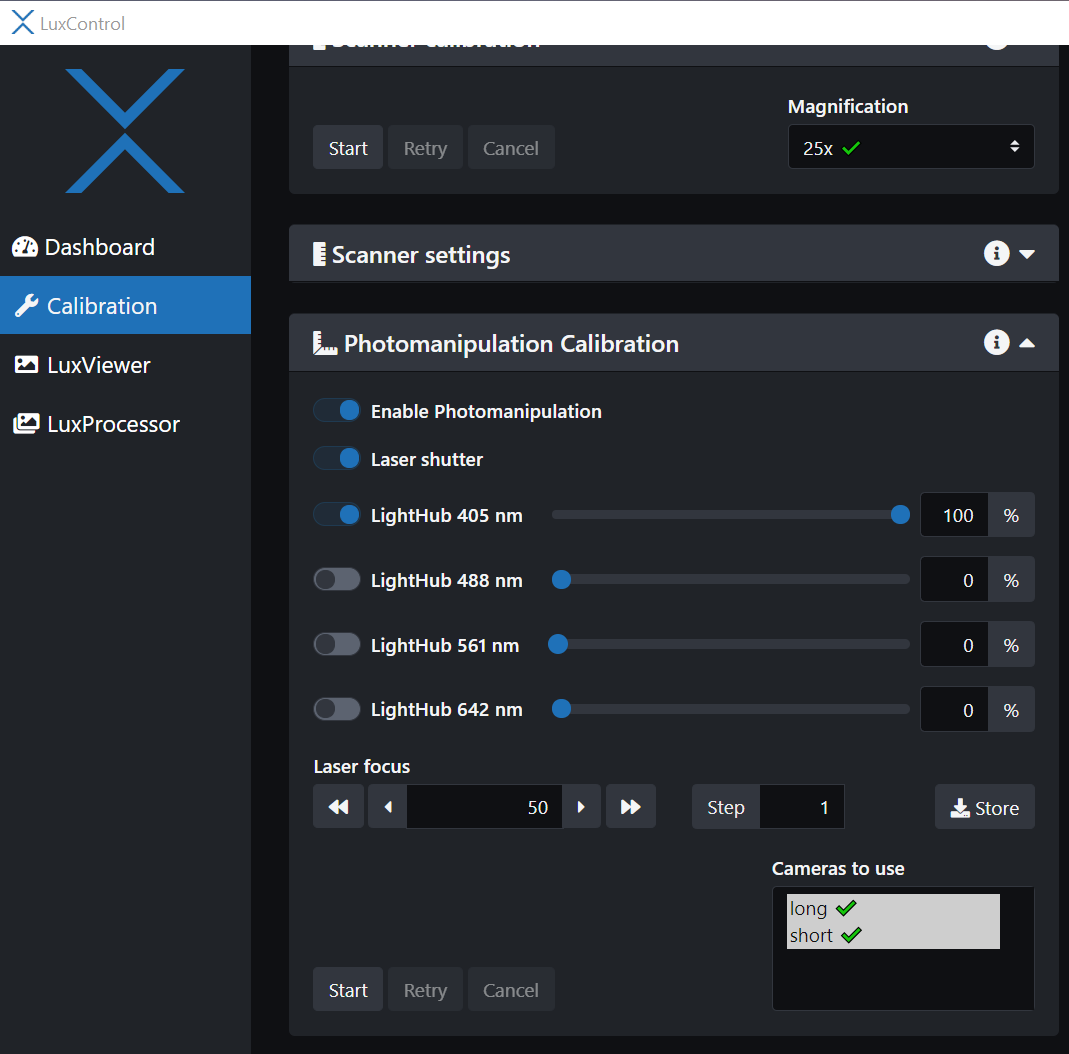
Click on the Calibration tab and open the Photomanipulation Calibration panel:
- Enable Photomanipulation
- Laser Shutter
- LightHub 405 nm on, with up to 100% intensity
- Select which camera to use, if you are not sure you can select both and the calibration will be done for both of them. You need to click on them to highlight them, as shown below.
- Start live and select the correct filters to observe the laser spot. For the 405nm laser, the BP 418-462 for the Filter Wheel Short and the LP 498 for the Filter Wheel Long usually work fine.
- Make sure to select the Ablation dichroic switch!

- Start the cameras Live, you should see a bright spot at the center of the field of view. Adjust the Laser focus in the Photomanipulation calibration panel until the spot is sharp and bright.

- If the spot looks too dim you can increase the camera exposure time.


- There is 5 steps in the Photomanipulation Calibration. If they all calibrate well you should see the laser spot move in 5 different location starting with the center and the purple circle should follow the laser spot.
- When you have successfully performed the 5 steps click finish. The PM module is now calibrated!
- If you need to perform photomanipulation with a different laser, just select another line and repeat the steps. You will need to change the filters and adjust the camera exposure as the other laser lines are less visible in the water due to less scattering.
-
Troubleshooting
- If the calibration does not succeed it is usually because the laser spot is too dim. Try adjusting the parameters until you can see the spot better: change the laser intensity, filters, camera exposure, double check you optimized the focus of the laser spot.
- If you know you only need to perform the calibration on one camera because you will only image one fluorescent wavelength, you can select only the appropriate camera and start the calibration again. It is usually easier to calibrate the short wavelengths camera.
Define the PM event
The next step is to define the photomanipulation event in your sample.
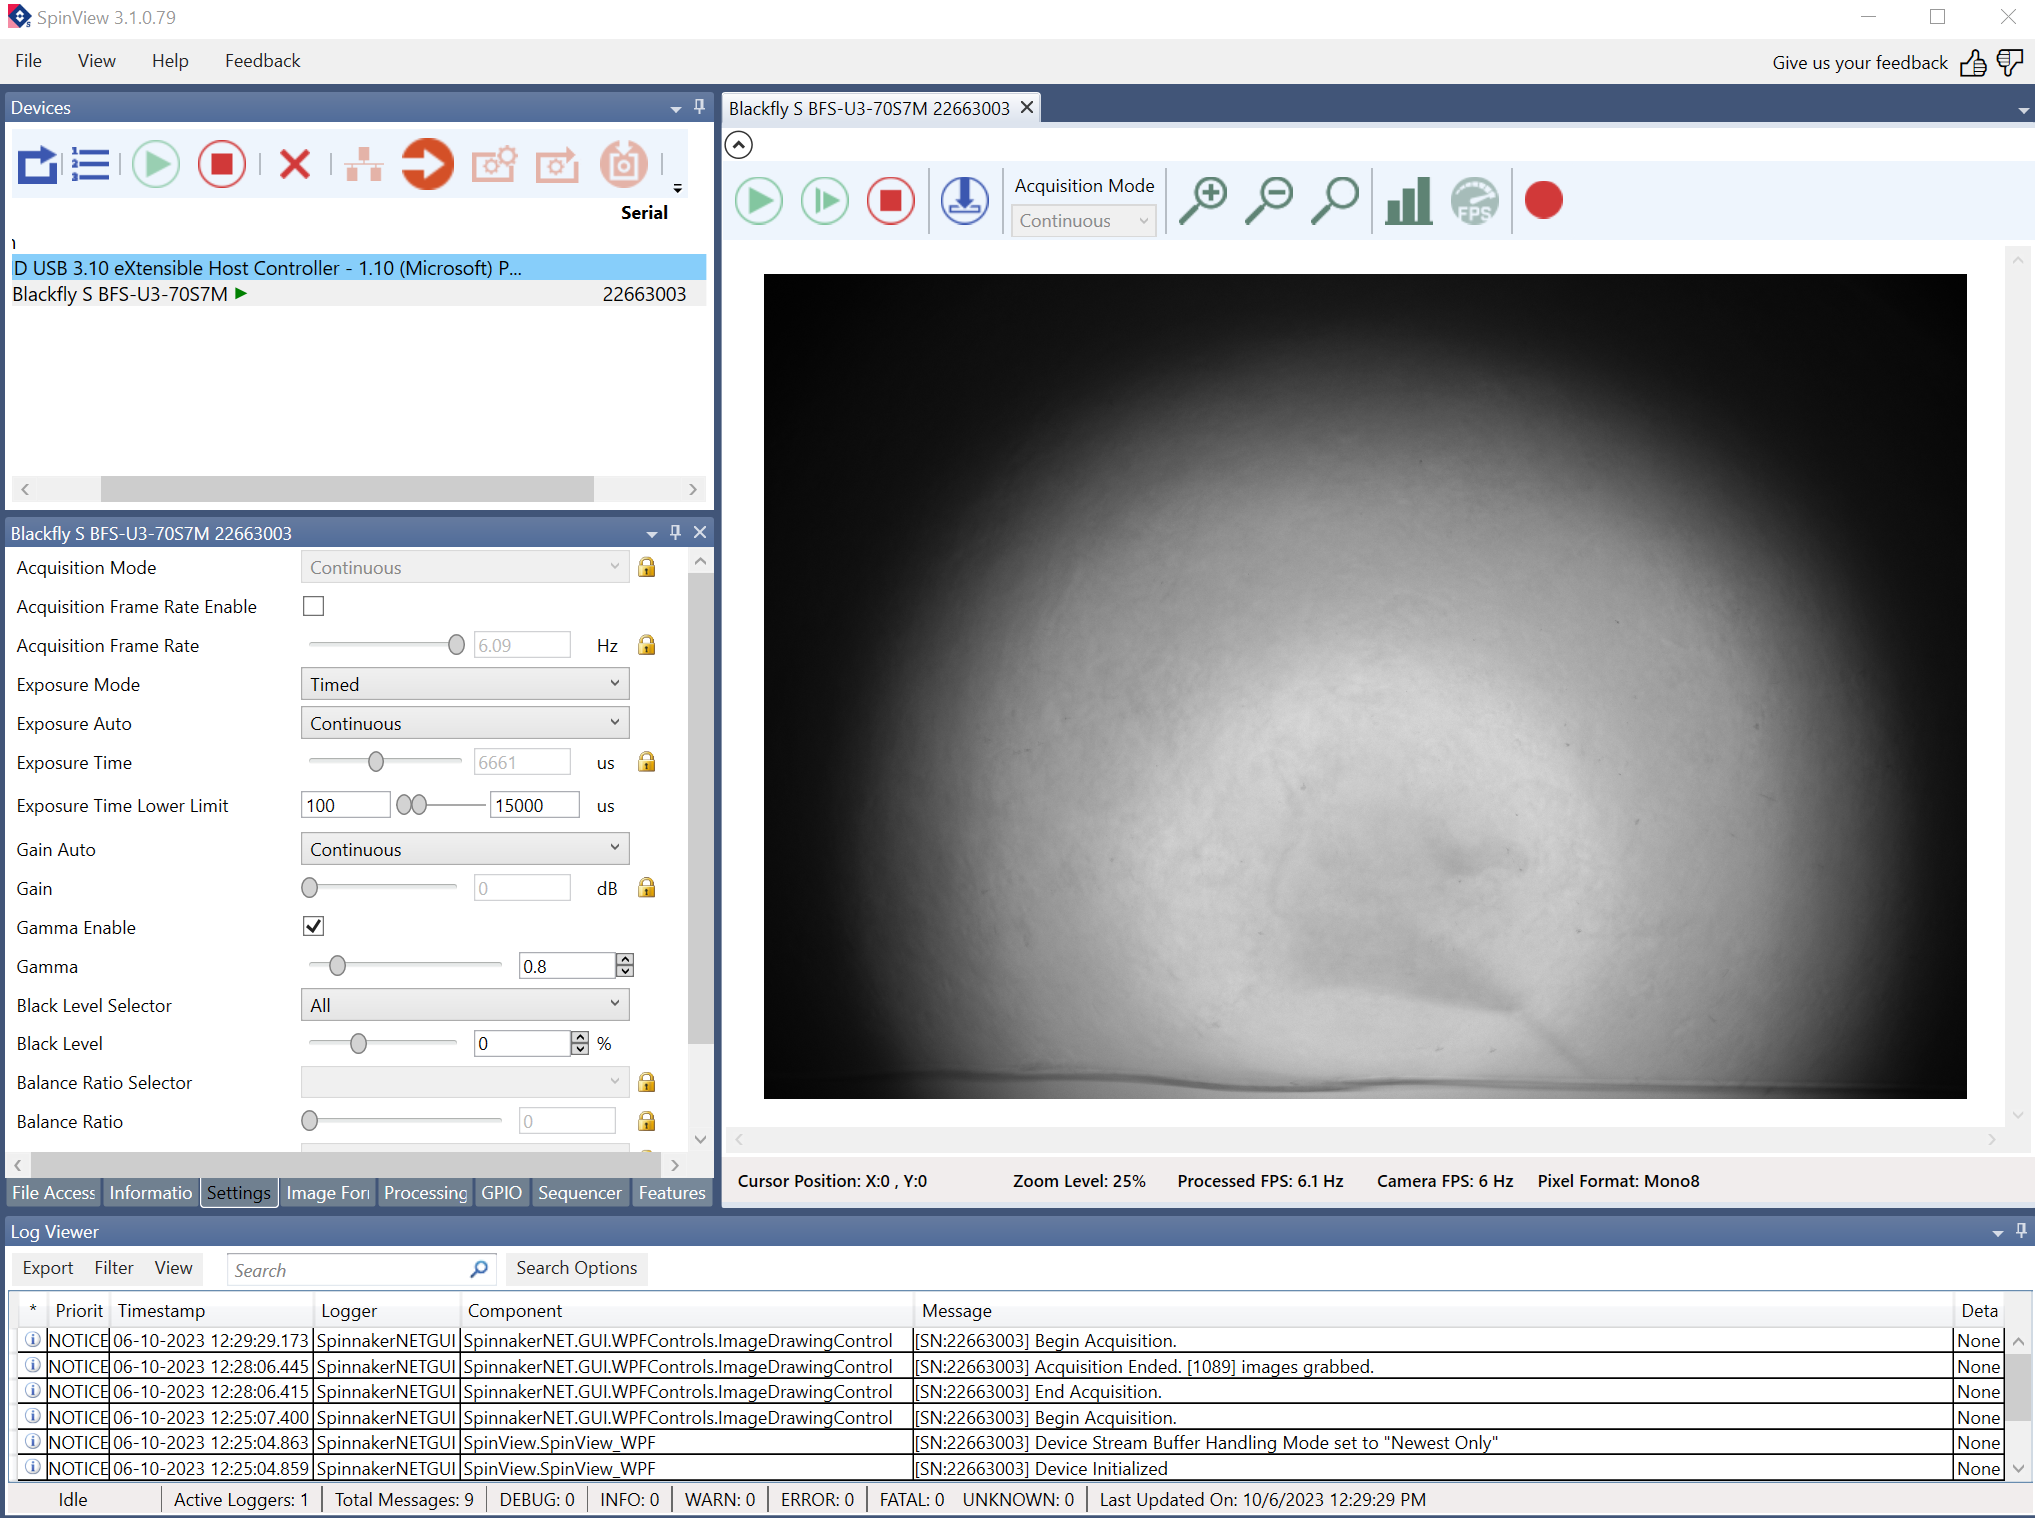
- Locate your sample with the BlackFly camera. In this tutorial we used a simple fluorescent gel, there is no bio sample in it. Turn on the LED light and open the SpinView software. Click Live.
- Once your sample is centered above the detection objective, close the BlackFly camera and start live in LuxBundle. Turn on the laser line(s) you need for your sample. Find an area you want to ablate. In the following example we are looking at a fluorescent gel.
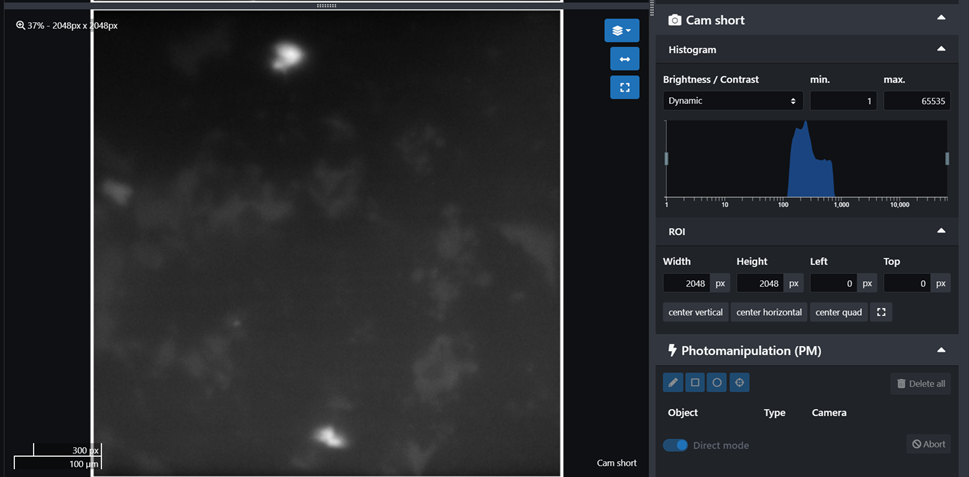
- Enable Photomanipulation. You can then adjust the ablation laser intensity and the other 3 parameters you need to set: The dwell time is the time the laser spot spends at each step. The number of repetitions can be increased if you want to repeat the ablation several times for a single z plane. The spacing controls the number of pixels covered by the ablation laser. Once you have defined an area or an object to be ablated, the total time it will take to perform the photomanipulation will appear in this window.
- Set the appropriate filters for imaging. This will depend on your sample and selected illumination laser line, as in regular experiments. Make sure the ablation dichroic is selected! You should be able to image with the ablation dichroic.
NOTE: Before running and experiment, check if the intensity of the object imaged with the ablation dichroic is within 10% of the intensity of the object imaged with an empty dichroic.

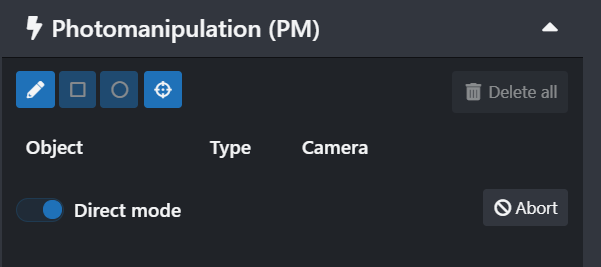
- When you enable Direct Mode you can choose to create a custom object with the little pencil icon.
- In order to create a rectangle of a circle shape you need to turn off the Direct Mode.

- Create the ablation pattern you want to perform and test it. You should see the laser spot ablate your sample according to the shape you chose.
NOTE: We recommend that you experiment with the photomanipulation on an area of your sample that does not present any interest before moving on to what you want to image in your experiment

Below is an example of ablation with a circular shape.

Set up an experiment with a PM event
Once you have decided on where and how to perform the photomanipulation, you need to set up the experiment.
A typical photomanipulation experiment should follow this format:
- Acquire a z-stack before any photomanipulation
- Perform the photomanipulation on selected z plane(s)
- Set the experiment for the duration you desire. For example, acquire a z-stack every 10 minutes for 24 hours.
Create a Channel for imaging
Always update the channel if any change is made! This channel should have all the imaging parameters you need: imaging laser, filters, camera parameters etc.

Create a separate channel for the Photo-Manipulation event
Creating this extra channel is the safest way to run the PM module. This channel should have the cameras off and be turned on only during the PM event.
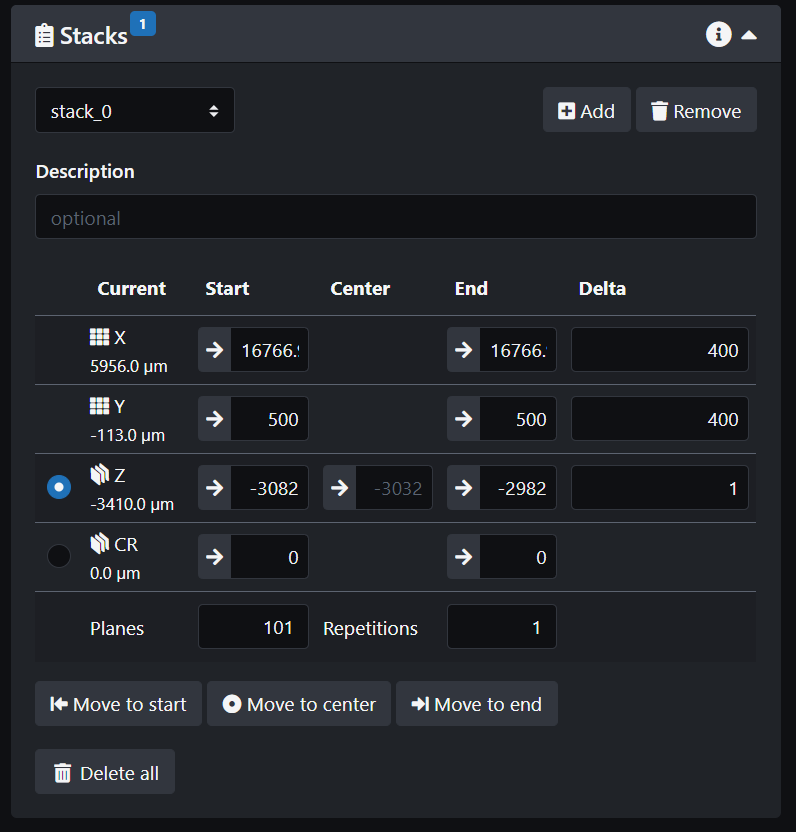
Create a z-stack
Create a PM object

Create Event 0
This is the event with the preliminary z-stack before photomanipulation.

Define the tasks:

Define a trigger:

Create Event 1
This is the event where the photomanipulation happens.

Define the tasks:
Make sure to select the channel created for the PM event for this event. Take note of the duration of the PM event so add a sufficient delay before starting the next event which is the imaging event of the experiment.
NOTE: As of April 2025, the software still runs all the events concurrently if the trigger is not properly defined! This is counter-intuitive. You should always calculate how long each event will take to run and then set the clock as such: Event_0 stars at time 0, Event_1 starts after the time it takes to run Event_0 and so on.
NOTE: Click on the settings icon next to the pm objects to define which z plane(s) should be photo-manipulated!

Define the trigger:
NOTE: Allowing the event to start after a few seconds is a good idea.

Create Event 2
This is the settings for the imaging experiment.

Define the tasks:

Set the trigger with a delayed start to make sure the PM event is fully completed:

Run the experiment
NOTE: Double check the triggers are set properly such that each event has time to run in order!!!
Always save your settings for future reference!

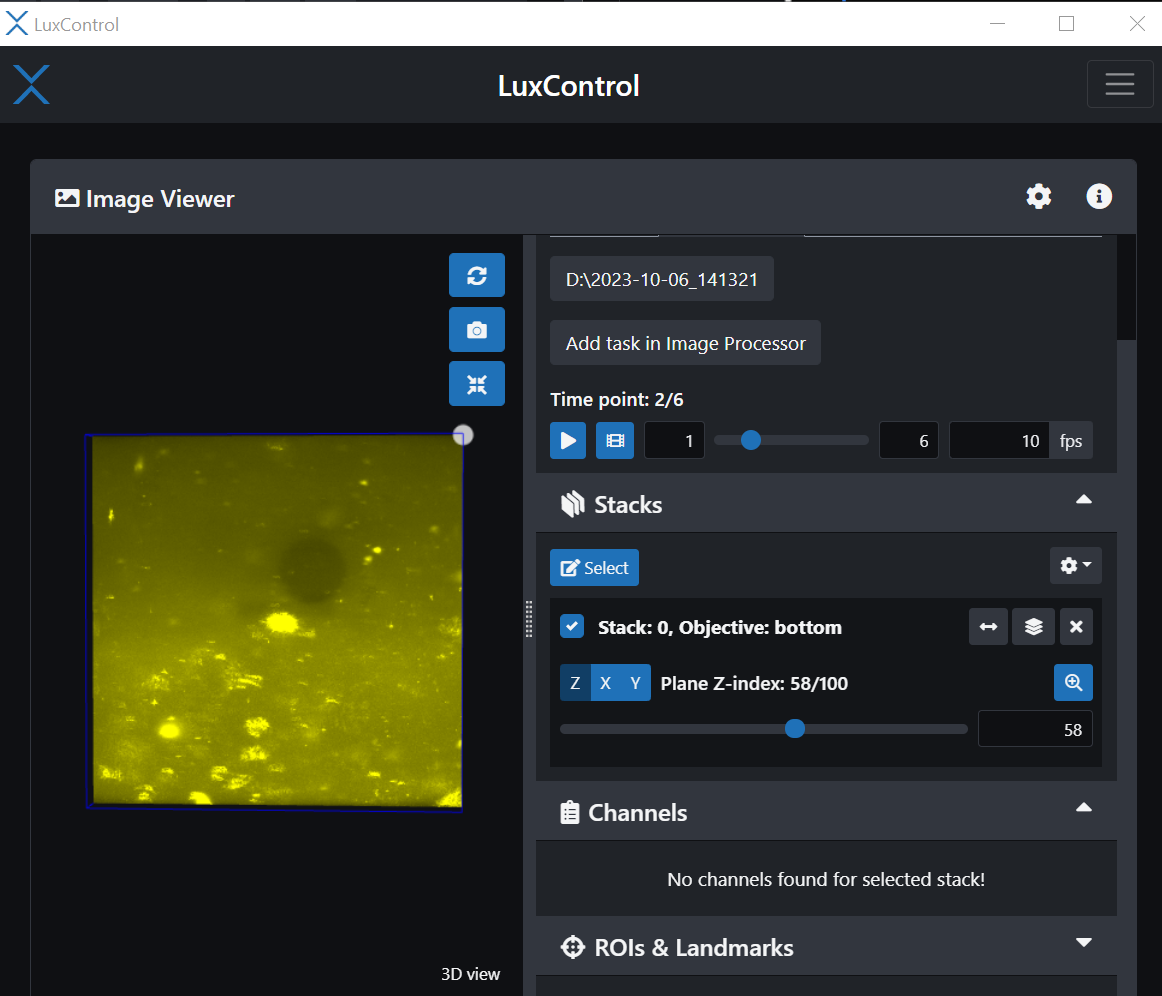
Look at the experiment with the image viewer in LuxBundle
- Select View last experiment or load your data in the Image Viewer.
- Select the imaging channels:

Go to the plane where you performed the ablation and you should be able to see it!
Current saving process with LuxBundle
As of November 2023, the software does not create a ims header or a big data viewer header for an experiment that contains a PM event. This is an error from LuxBundle and they are trying to fix it. Unfortunately, this bug also prevents the post-processing creation of ims headers. This means that you won't be able to look at your data in Imaris or Big Data Viewer by Fiji.
- Suggested work-around
Do not create an experiment that contains a PM event! Instead:
-
- Acquire a single stack pre-PM event as experiment 1.
- Perform the PM independently
- Launch an experiment to image the stack at several time points.
Always reach out to the Beckman center staff if you are in doubt about the process.